The results of your Epson L3110 printer are striped? The way to solve it is very easy
Why, follow the steps in this article. How are you? Hopefully you and all of us are always in good health.
In this article, Mimin will share experiences in overcoming yield problems striped print on the Epson L3110 printer when used to print document.
So, the story is that about a week ago, Mimin was using a printer Epson L3110 at home to print your thesis for exams.
Mimin then put the paper into the printer, then executed the command print as usual, and the printer starts the printing process.
However, there is something strange about the print results, the writing printed above the paper appears streaky, as if the ink did not print perfectly.
Mimin thought oh maybe this is because the L3110 printer hasn't been working for a few days used, so the ink does not flow completely.
Mimin then repeats the print command hoping that the print results will improve, but it turns out it still has the same lines as the first one.
It seems that this printer really needs further treatment and that's fortunate mimin has already overcome a similar problem, only on the Epson printer series other.
However, whatever the printer series, the cause of striped print results is the same.. OK, here's the description...
Causes of Epson L3110 Striped Print Results
For your information, the striped print results on the Epson L3110 printer are caused by a problem with the printer head component which results in the ink output path being disrupted so that the document does not print perfectly.
The problems that often occur with printer head components include:
- Dirty or clogged is caused by residual ink deposits covering the nozzle.
- Damaged so it can no longer be used.
Print results that are dotted, striped or blurry are mostly influenced by the print head components, although sometimes they also occur because the ink hose is caught in air.
To find out the condition of the print head, you can do this by checking the nozzle.
How to deal with Epson L3110 striped print results
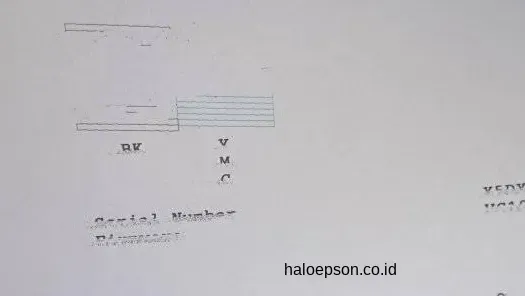
To overcome striped print results on the Epson L3110 printer, you can do this by running the Head Cleaning command.
Head cleaning aims to clean the printhead components from all dirt or remaining ink so that the ink output path can run smoothly again.
The Head Cleaning command itself can be done manually using the buttons on the printer (without a PC/laptop) or it can also be done with the help of the Windows system (using a PC/laptop).
OK, here I explain the two methods...
1. Handle Epson L3110 striped print results
This method is quite simple because just by using a button on the Epson L3110 printer, we can carry out the head cleaning process to deal with striped print results.
Here are the steps:
- Connect the L3110 printer to the PC/laptop, turn on the printer by pressing the power button.
- Then, press and hold the ink button (triangular circle), followed by pressing the power button 1 time, while still pressing the ink button.
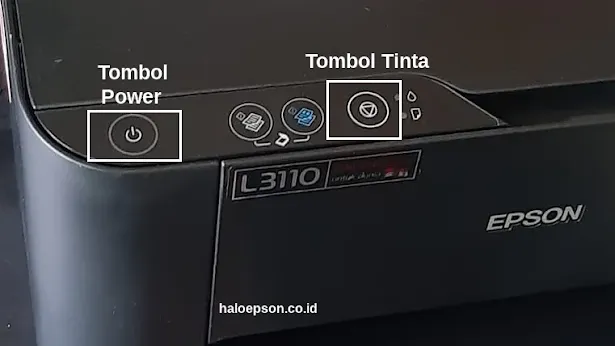
- Wait up to 5 seconds and release the ink button.
- The printer will print the results of the nozzle check to see the condition of the Printer Head (make sure the printer has been filled with paper beforehand)
- Then, press and hold the ink button again until the power button light flashes or until the printer makes a sound, then release.
- The printer will run the Head Cleaning process, wait for it to finish.
- Try the printer to see the print results
- If the Epson L3110 printer results are still striped, repeat the steps above again until you get perfect print results.
- Finished.
Note: if the printer does not react when performing the steps above, then there may be an error in the process of pressing the button.
2. Resolve Epson L3110 striped print results with the help of Windows
Apart from the manual method above, we can also carry out the head cleaning process automatically with the help of the Windows system.
Incidentally, in this tutorial, Mimin will use Windows 10, here are the steps:
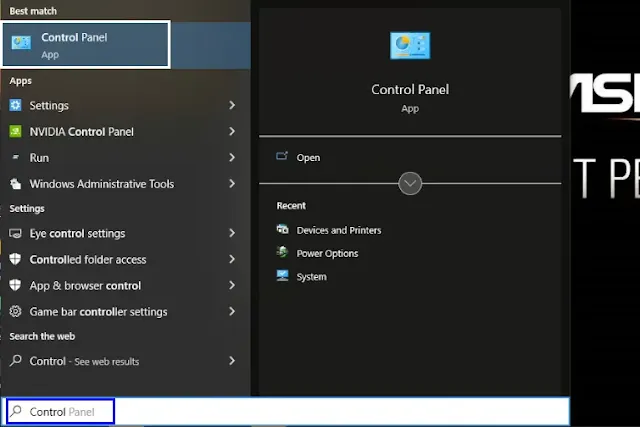
- Open the Control Panel menu in Windows 10, to speed things up, just type in the Search column.
- In the Control Panel window, click the Hardware and Sound menu.
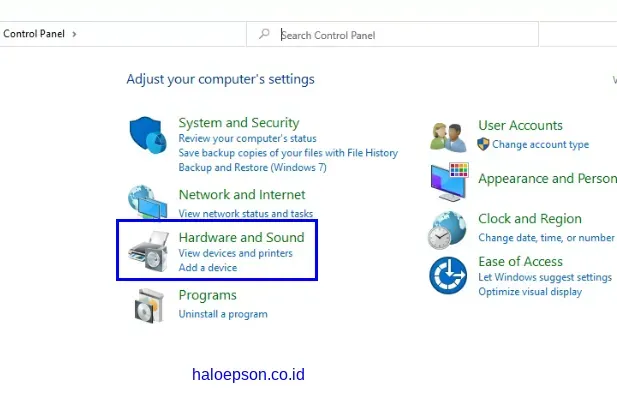
- Then, click the Devices and Printers option to see the Epson L3110 printer icon.
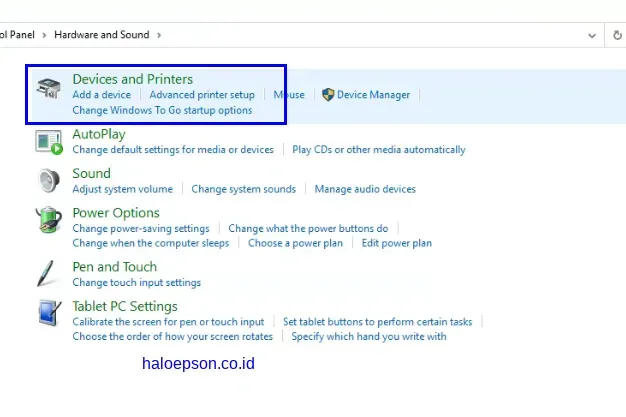
- Move the mouse cursor to the Epson L3110 printer icon, then right click and select Printing Preferences.
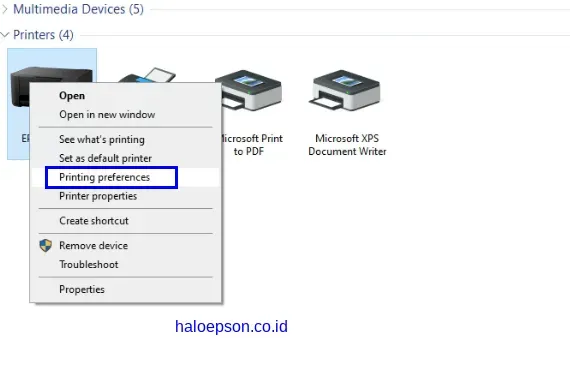
- In the Epson L3110 Series Printing Preferences window, click the Maintenance tab and select Head Cleaning.
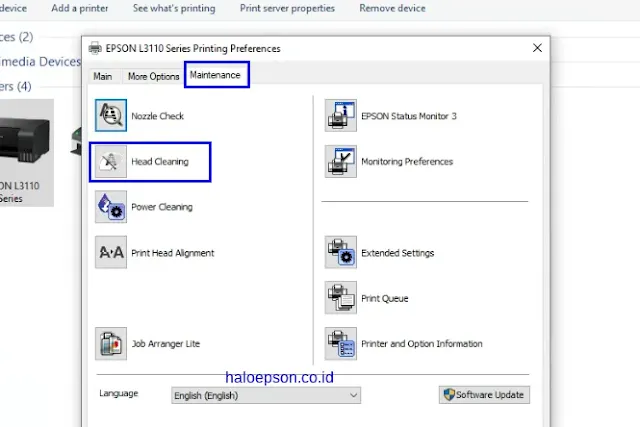
- Click Start to start the cleaning process.
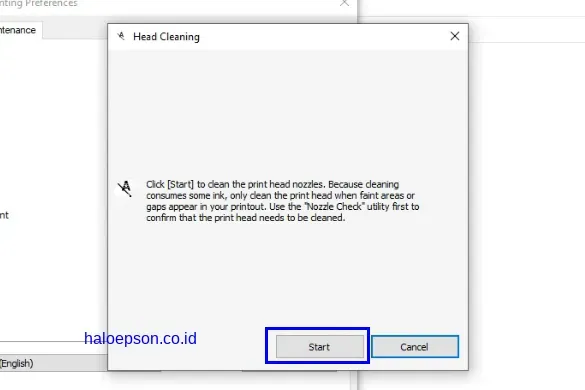
- Wait until the process is complete.
- When finished, click the Print Nozzle Check Pattern option, then click Print.
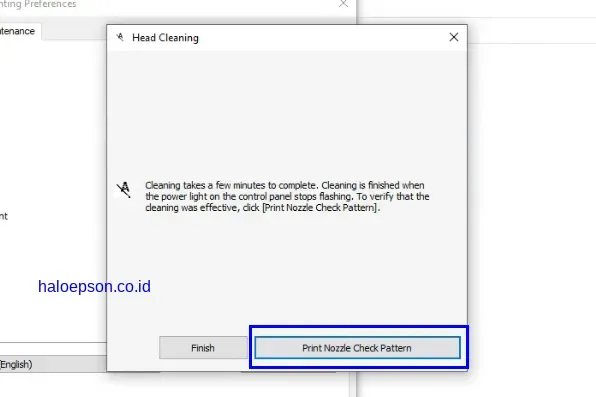
- Make sure the printer is filled with paper to see the cleaning results directly.
- Click Finish to finish the cleaning process.

- The Epson L3110 printer is ready to be used again.


0 Comments